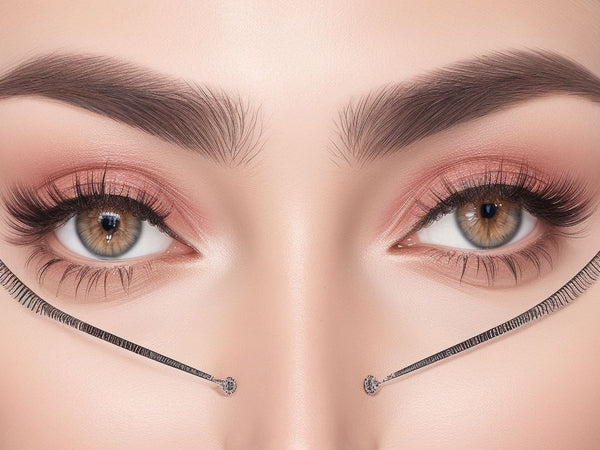
Lash Mapping 101 How to Create a Perfect Set Every Time

Lash mapping is a must for perfect lash extensions. You can make eyes pop with individual lashes, all while adding beauty. Here, we'll explore the art of lash mapping. Plus, some tips to help you become an expert!
Precision is key in lash mapping. Measure eye shape, size, symmetry, and desired outcome. Analyze these elements to craft a customized lash design. Accentuate features for the most flattering look.
Start by assessing the eye shape and structure. Almond, round, or hooded? Each requires a different approach. Understand the eye anatomy and work with its contours. Create the illusion of bigger eyes or lift drooping lids.
Also consider your client's personal preferences. Do they want dramatic and voluminous? Or natural and subtle? Discuss expectations and requests before mapping.
Map the lash design on paper or digitally. Visualize how different lengths and curls will look. Play around with styles until you find the one that fits.
Time for application. Keep in mind, symmetry is key. Both eyes should be the same. Take your time and make adjustments as needed.
What is Lash Mapping?
Lash mapping is a skill used by lash artists to craft customized eyelash extensions. It requires evaluating the eye shape, bone structure, and natural lashes of the client to design a look that suits them. By plotting where each extension should go, symmetrical results can be produced.
Precision is vital for lash mapping. Lash artists must look at the eye shape to decide a suitable lash style. This could be from a cat-eye with longer lashes at the outer corners to a more natural look with evenly placed extensions. Additionally, the client's natural lashes must be taken into account for an ideal match. Factors such as length, thickness, and curl should be considered. Extensions that either match or enhance the natural lashes should be chosen for a harmonious outcome.
Tip: Monitor the client's needs and adjust your lash mapping accordingly. As their personal preferences or lashes may change over time, paying attention to these alterations will help maintain customer contentment.
Importance of Lash Mapping for a Perfect Set
Lash mapping is a must for eyelash extension technicians. Strategically placing individual lashes, this process customizes a flawless look, enhancing the natural beauty of the eye. Its precision allows for each lash extension to be securely bonded to the natural lash.
Additionally, lash mapping considers desired thickness, length, and curl. This allows clients to achieve their desired look without compromising the natural result.
Vogue Beauty Magazine states that mastering the art of lash mapping is essential for any professional eyelash technician in order to deliver stunning results every time.
Tools and Materials Needed for Lash Mapping
Tweezers are essential for a flawless lash set. Get high-quality tweezers with pointed or curved tips to handle individual lashes with precision. Opt for an adhesive that dries quickly, is strong and safe for sensitive eyes. Have lash extensions in different lengths, thicknesses and curls to cater to clients' unique preferences. Use mapping stickers to mark the desired position of each extension to maintain consistency. Utilize a lash tile or palette to organize and keep your extensions clean. Lastly, provide a handheld mirror for your clients to check their new look once the mapping is complete.
In the beginning, I neglected to purchase premium tweezers. This made applying lashes difficult and I dropped many. After upgrading, my efficiency and work quality improved drastically. The right tools make a huge difference in creating amazing lash sets.
Step-by-Step Guide on How to Create a Perfect Set Using Lash Mapping:
A stunning set of lashes can change someone's look! Lash mapping is a technique that makes flawless lash extensions. Measurements and placement that are exact help make sure each individual lash extension looks great with natural lashes.
To get a perfect set with lash mapping, do these 3 easy steps:
- Identify Eye Shape: All eye shapes are different, so it's important to know the client's eye shape before starting lash mapping. Look closely at their eyes and see if they have almond-shaped, round, or hooded eyes. Knowing their eye shape helps make the lash extensions suited to them, showing off their natural beauty.
- Know Desired Lash Effect: Discuss with the client what look they want. Some may want a more natural look with even length and volume, while others may want a dramatic effect with longer lashes on the outer corners for a cat-eye. Knowing their preference helps make customized extensions to fit their needs.
- Make a Mapping Grid: Now use your imagination! Put small adhesive dots or markers on the client's eyelids to make a mapping grid. This helps put individual lash extensions in the right place, making sure they look symmetrical. The grid should be in line with features such as brow arches and eye corners to make the result balanced and perfect.
Keep these points in mind while using lash mapping techniques:
- Strategic Placement: Place longer lashes in the mapping grid carefully. Putting them on the outer corners can improve the shape of different eye types.
- Customization is Key: Every client has unique likes, so figure out what their desires are before starting.
- Symmetry Matters: Keeping symmetry between both eyes is necessary for an attractive outcome. Step back often and check your work to make sure it looks the same on both sides.
By following these steps and thinking about these tips, you can make perfect lash extensions with lash mapping. So, show off the beauty of your clients' eyes and make them feel beautiful and glamorous!
Tips and Tricks for Achieving a Perfect Set Every Time
To ace the art of lashing each time requires finesse and precision. Let's discover some tips and tricks which will help you craft amazing lash extensions!
- Pick the correct lash mapping method: Try out various techniques, such as doll-eye, cat-eye or natural-style mapping. Each method produces a distinct look, so pick one that matches your client's taste.
- Get top-notch lashes and adhesive: Investing in premium-quality lashes and adhesive is critical for a perfect outcome. Opt for brands known for their durability and comfort to guarantee long-lasting and snug wear.
- Accustom the length and curl: Fit each lash extension to your client's natural lashes by selecting the appropriate length and curl. This customization will boost the overall look and produce a uniform blend with their existing lashes.
- Master your isolation technique: Properly isolating each individual lash before adhering an extension is essential to avoid clumping or damage. Enhance your isolation skills through practice and use precision tweezers to achieve a neat separation.
Besides these tips, there are other vital factors to contemplate during the lash application process. Making sure your workspace is well-lit will aid you in seeing every detail clearly. Furthermore, practicing good posture while working will fend off discomfort and yield better results.
Pro Tip: Regularly updating your knowledge on new techniques, products, and trends within the lash industry will help you stay ahead of the curve and give outstanding service to your clients.
Common Mistakes to Avoid in Lash Mapping
Be sure not to skip the consultation process! Neglecting to discuss lash goals with clients can cause unsatisfactory results. When mapping, keep an eye out for natural lash direction, or else extensions can appear clumpy and misaligned. Tape placement should also be consistent - this will help to isolate individual lashes during the application process. Match the lengths and thicknesses of the extensions to the client's natural lashes, so as to not damage the follicles. Provide clients with aftercare guidance, or else their extensions may shed prematurely.
Remember, every client's eye shape and natural lashes are different. Factor this into the mapping process for a tailored approach. Pay attention to details such as lash curl, length, thickness, and placement - this will create a seamless look. Keep up with industry trends, attend training sessions, and seek feedback from clients - this will help you offer exceptional service that keeps people coming back.
Don't miss out on mastering proper lash mapping techniques! Avoid common mistakes and take control of your success. Through practice and understanding of your clients' needs, you'll achieve flawless results every time!
Conclusion
It's crucial to master lash mapping for flawless sets each time. Knowing the unique needs and preferences of each client helps tailor their lash designs to enhance their beauty. Consider factors like eye shape, lash density, and style for customized results. Pick the right lash lengths, curls, and thicknesses to balance the features. Placement of lashes along the lash line is essential for a natural yet glamorous effect.
Paying attention to detail throughout the application process is necessary. Isolate each individual lash, apply adhesive correctly, and prioritize safety and hygiene with quality products and proper sanitization. Pro tip: Consult with the client and listen to their expectations before starting any procedure. This will help understand their desired outcome and build trust. Effective communication is vital to delivering excellent results.
Additional Resources and References
Sharpen your lash mapping skills and get flawless sets each time! Check out these resources and references:
- Tutorial Videos: Watch famous lash artists share their tips, techniques, and experiences in lash mapping. Get valuable insights and learn how to create lash styles for various eye shapes.
- Mapping Guides: Read guiding docs to understand the principles of lash mapping. These break down the process for you, helping you make customized sets with individual client needs in mind.
- Workshops: Join training sessions conducted by industry experts. Get hands-on practice and personalized feedback to upgrade your technique.
Grow your expertise in lash mapping with these resources and references. Keep up with the latest trends, techniques, and tools. Deliver results that exceed client expectations!
Unlock your potential as a skilled lash artist. Explore these resources and refine your craft. Build your confidence as you create perfect sets!
Frequently Asked Questions
1. What is lash mapping?
Lash mapping is a technique used in lash extensions to create a customized and symmetrical look for each individual client. It involves carefully planning and mapping out the placement of lash extensions to enhance the natural eye shape and create a perfect set.
2. How do I start lash mapping?
To start lash mapping, begin by analyzing the client's eye shape, natural lashes, and desired outcome. Use a mapping pen or pencil to mark key points on the eyelid, such as the inner and outer corners, center point, and lash length. This map will guide you in placing the extensions accurately.
3. What tools do I need for lash mapping?
For lash mapping, you will need a mapping pen or pencil, a ruler or measuring tape, lash adhesive, lash extensions, and tweezers. These tools will help you measure and place the lashes precisely according to the lash map you create.
4. How can lash mapping help me create a perfect set every time?
Lash mapping ensures that each lash extension is strategically placed to complement the client's eye shape and natural lashes. By following the lash map, you can achieve symmetry, even spacing, and a flawless look. It helps you deliver consistent and amazing results for your clients.
5. Can lash mapping be customized for different eye shapes?
Yes, lash mapping can and should be customized for different eye shapes. Every client has unique features, and a one-size-fits-all approach won't work. By analyzing the client's eye shape and modifying the lash map accordingly, you can create a set that enhances their natural beauty and suits their specific needs.
6. Are there any tips for beginners to improve their lash mapping skills?
For beginners, it's important to practice lash mapping on a variety of eye shapes and sizes. Familiarize yourself with different mapping techniques and observe experienced lash artists. Take your time during the mapping process and make adjustments as needed. With practice and patience, your lash mapping skills will gradually improve.


